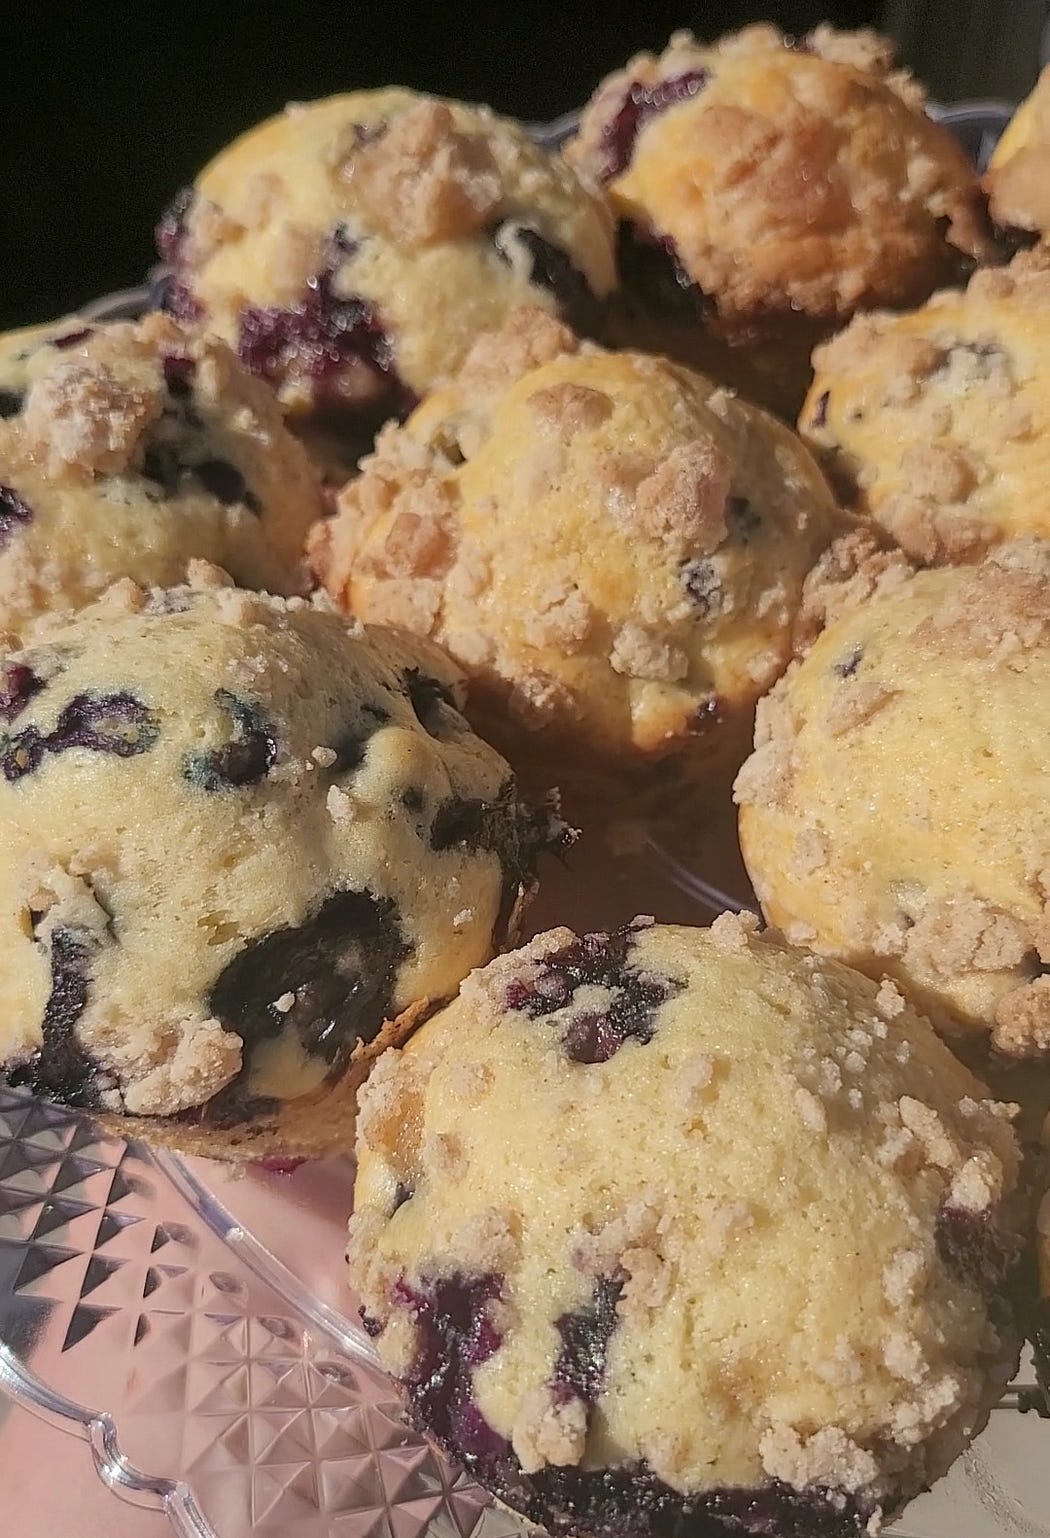
Look on my blog for my blueberry muffin recipe! It is to de for!
We had our middle son’s birthday party over the weekend! It was a great time getting to celebrate him! We had all his favorite foods: from the main courses down to the fruits!
Like always, the next day I am staring at a mountain of leftovers thinking how can I use these? I can always vacuum seal my blueberries and freeze them for the next time I want to bake a healthy dessert, but sometimes we want to use them right now! Here are some ideas of how you can use up blueberries before they go bad:
Blueberry muffins
Overnight oats
Blueberry pancakes or waffles
Blueberry crumble bars
Blueberry pie
Blueberry cheesecake
Blueberry jam
Blueberry oat bars
Blueberry yogurt pops
Blueberry smoothies
Blueberry crisp
Lemon blueberry bread
Blueberry breakfast cake
Blueberry scones
Blueberry lemonade
Blueberry cinnamon rolls
Blueberry coffee cake
Blueberry ice cream
Blueberry white chocolate cookies
Blueberry oatmeal cookies
There are a million ways we can use leftover fruits! If you are not in the mood to use them at the moment, don’t throw them out! You can store blueberries at any point by using methods like freezing them or storing them in a sealed mason jar in the fridge. Fruits keep longer in sealed mason jars versus other sealed containers.
I hope this helps you! I am not one to waste food so I find any and every way I can use what I buy! My Nanny would not be proud of me if I told her I threw out two containers of blueberries! That is definitely not how she raised me!
For more insights on budget-friendly dinner ideas, easy dinner recipes, dessert recipes, meal plans, and the myriad of health benefits offered by natural foods, don’t forget to follow Homemaker Recipes. I’m here to help busy moms, health enthusiasts, and everyone in between discover the joys and benefits of home cooking! Home is where the best things are made!
Saved from Pinterest from The Girl Behind The Curtain
I have a new food phase at the moment and I adore it! Overnight oats are my go-to these past weeks! They are easy, they have a way better flavor then normal hot oats, and there is SO much you can do with them! This no-cook, easy-prep breakfast option is not just a time-saver but also a nutritional powerhouse. Let’s dive into the world of overnight oats and discover why it might just become your new morning favorite.
Overnight oats are the epitome of convenience in a jar. By soaking oats in liquid overnight, you’re left with a creamy, pudding-like breakfast that’s ready to eat right out of the fridge. No cooking, no hassle, and what’s more, the flavor possibilities are endless.
Health Benefits
- Rich in Fiber: Oats are high in soluble fiber, which aids digestion and keeps you feeling full longer. - Heart Healthy: The beta-glucan fiber in oats can help lower cholesterol levels. - Stabilizes Blood Sugar: The slow-digesting carbs in oats help maintain stable blood sugar levels, making it an excellent choice for those monitoring their glucose intake. AKA, good for a diabetic! - Customizable: You can boost the nutritional value by adding fruits, nuts, seeds, and protein sources of your choice.
Ingredients: - 1/2 cup rolled oats - 1/2 cup almond milk (or any milk of your choice) - 1/4 cup mixed berries (fresh or frozen) - 1 tablespoon chia seeds - 1 tablespoon honey or maple syrup - A pinch of salt - Optional toppings: more berries, a dollop of Greek yogurt, or a sprinkle of granola
Instructions: 1. In a mason jar or airtight container, combine the oats, almond milk, berries, chia seeds, honey, and salt. Stir well to mix. 2. Seal the container and refrigerate overnight (or at least 6 hours). 3. In the morning, give it a good stir. If the mixture is too thick, you can add a little more milk to reach your desired consistency. 4. Top with additional berries, Greek yogurt, or granola, and enjoy!
Chocolate and Hazelnut
Ingredients: - 1/2 cup rolled oats - 1/2 cup milk of choice - 1 tablespoon cocoa powder - 1–2 tablespoons hazelnut spread - 1 tablespoon chopped hazelnuts - 1 tablespoon chocolate chips - A pinch of salt
Instructions: 1. In your chosen container, mix the oats, milk, cocoa powder, hazelnut spread, and salt until well combined. 2. Cover and leave in the fridge overnight. 3. Before serving, top with chopped hazelnuts and chocolate chips for that extra decadence.
Why Overnight Oats Are a Win-Win: The beauty of overnight oats lies in their simplicity and versatility. Whether you have a sweet tooth or prefer something more savory, there’s an overnight oats recipe out there for you. Plus, they’re incredibly forgiving — if you mess up the proportions, it’s easy to adjust in the morning.
For those of us trying to balance a busy schedule with healthy eating, overnight oats are a dream come true. Prep them the night before, and you’ve got a grab-and-go breakfast that keeps you energized and satisfied until lunch. For you and the kids! As I stated above, my youngest bonus son loves my banana cinnamon overnight oats! This is a great source of nutrition for picky little eaters! The oats, the yogurt, the fruit, all of it is very beneficial for their little growing bodies!
Here are some extra recipes for you!
Saved from AndiAnne on Pinterest
Thank you for reading!
For more insights on budget-friendly dinner ideas, easy dinner recipes, dessert recipes, meal plans, and the myriad of health benefits offered by natural foods, don’t forget to follow Homemaker Recipes. I’m here to help busy moms, health enthusiasts, and everyone in between discover the joys and benefits of home cooking! Home is where the best things are made!
Tuesday: Pork Roast and Beans in the crock pot with a side of mashed potatoes
Wednesday: Crockpot chicken pasta and salad
Thursday: Tilapia and I haven’t decided what else LOL
Friday: Pizza
Saturday: Birthday Party!
Sunday: Chicken alfredo and garlic bread
Here is our meal plan for the week! Thank God for meal planning because I would lose my mind if I had to think of dinner every night!
Do you want to learn how to meal plan? Discover the ultimate solution for busy parents with my digital download, designed to make family dinners a breeze.
“Meal Planning Made Easy” is a digital guide, your go-to resource for easy meal planning. Say goodbye to the overwhelming feeling of deciding what’s for dinner every night. With just a few simple steps, you can bring ease and organization to your kitchen routine, leaving you with more time to get done what you need to (because God knows that list is not getting any shorter)!
How does it work? It’s as easy as printing and preparing. Once you download the guide, you can print it out and transform it into a reusable tool. I laminate each sheet, but you can slide them into plastic sleeve covers to create a convenient binder. Every Sunday (that’s when I meal plan), open your personalized planner, circle the delicious meals that work for your family that week, and plan your grocery list for the week ahead. It’s a foolproof way to save money, save time, and save sanity!
In this guide, you will find everything you need to revamp your meal-planning routine:
1. An Introduction to Meal Planning
2. Over 500 Daily Dinner Options for every day of the week plus MORE: side dishes, quick dinners, and substitute dinners
For more insights on budget-friendly dinner ideas, easy dinner recipes, dessert recipes, meal plans, and the myriad of health benefits offered by natural foods, don’t forget to follow Homemaker Recipes. I’m here to help busy moms, health enthusiasts, and everyone in between discover the joys and benefits of home cooking! Home is where the best things are made!
They are a perfect way to use up fruit before it goes bad!
A good excuse to eat chocolate!
And it’s just simply a delicious healthy treat! Have fun with this!
For more insights on budget-friendly dinner ideas, easy dinner recipes, dessert recipes, meal plans, and the myriad of health benefits offered by natural foods, don’t forget to follow Homemaker Recipes. I’m here to help busy moms, health enthusiasts, and everyone in between discover the joys and benefits of home cooking! Home is where the best things are made!
This is the best chocolate chip cookie I have found in all my years of baking! My kids love them, my hubby loves them, and even all the picky picky picky customers at my restaurant love them! When the public loves it, you know you win! So I won’t keep you waiting till the end, here’s the recipe!
Now in all my years of baking, I have found there are more ways than we care to mention on how we can screw up a good cookie! So here is a list of all the ways I could think of to help you create the best cookie every time!
1. Read the Recipe First: Always start by reading the recipe thoroughly to ensure you have all the ingredients and understand the steps. If you need to substitute ingrdients thats ok but let’s be prepared.
2. Room Temperature Ingredients: Use room eggs for a smoother batter and even baking. Butters need to be cold to room temperature, NOT MELTED.
3. Measure Accurately: Use measuring cups and spoons for dry ingredients and a liquid measuring cup for liquids. Too much flour, too much baking soda, etc etc can ruin a good cookie.
Smookies - my families favorite cookie! Using the chocolate chip cookie recipe from above.
4. Sift Dry Ingredients: Sifting flour and other dry ingredients helps to avoid lumps and incorporate air for lighter cookies. Did you know recipes are made for sifted (or fluffed) flour, not packed, right out of the bag flour?
5. Chill the Dough: Chilling the dough can improve the texture and flavor of the cookies. This was a hard one for me because I am impatient and wanted to job done, but I learned to use that chill time to clean up my mess and handle other small chores, or even cook dinner, while the dough chilled.
6. Don’t add in ingredients without thinking about the rest: You can add in other chocolates, other candies, anything like that without issues. However you can not go adding extra liquids without adding in the appropriate flours to keep the dough right.
7. Avoid Overmixing: Mix until just combined to keep cookies tender.
8. Uniform Size: Use a cookie scoop for evenly sized cookies that will bake uniformly. This is one of my favorite baking hacks!
9. Parchment Paper is Key: Line baking sheets with parchment paper to prevent sticking and ensure even browning.
10. Oven Thermometer: Use an oven thermometer to ensure accurate baking temperatures. Not neccessary but never hurts!
11. Rotate Baking Sheets: Halfway through baking, rotate the sheets for even cooking.
12. Cooling is Crucial: Let cookies cool on the baking sheet for a few minutes before transferring them to a cooling rack.
13. Experiment with Add-Ins: Try different mix-ins like nuts, chocolate chips, or dried fruit. The trend lately is adding pretzles to cookie dough!
14. Check Your Leaveners: Ensure baking powder and soda haven’t expired for proper rise.
15. Do Not Overcrowd: Leave enough space between dough balls for cookies to spread.
16. Keep Dough Cool: If baking in batches, keep the remaining dough in the fridge.
17. Underbaking Slightly: For chewier cookies, remove them from the oven when they’re just slightly underbaked.
18. Use a Silpat Mat: A silicone baking mat can be used for even heat distribution if you are not a fan of parchment paper.
19. Flavor Extracts: Experiment with different extracts like vanilla, almond, or lemon for varied flavors. People are preferring vanilla paste over vanilla extract here recently.
20. Brown vs. White Sugar: Brown sugar yields moister and denser cookies, while white sugar makes them crisper. I switched to brown sugar years ago and I won’t go back!
21. Check Your Oven Hot Spots: Knowing your oven’s hot spots can help place the cookie sheet for even baking.
22. Salt Matters: A pinch of salt enhances the flavors in your cookie.
23. Rest the Dough: Resting the dough before baking can deepen the flavors. Another reason we chill the dough.
24. Hand Mixing Option: For denser cookies, mix the dough by hand instead of using a mixer.
25. Spice It Up: Don’t be afraid to add spices like cinnamon or nutmeg for a flavor boost. If you ask me, cinnamon goes in everything!
26. Golden Brown Rule: Bake until just golden brown for the perfect texture.
27. Cool Sheets Between Batches: Allow baking sheets to cool between batches to prevent spreading.
28. Storage Technique: Store cookies in an airtight container to keep them fresh. My nanny always told me to keep a heal of bread in there with them so they don’t get hard! And Nanny s never wrong!
29. Freeze Extra Dough: Cookie dough can often be frozen for future use.
30. Have Fun: Don’t be afraid to experiment and have fun with your cookie recipes! Get the kids involved! I promise you the mess will be big but the memories will be bigger!
For more insights on budget-friendly dinner ideas, easy dinner recipes, meal plans, and the abundance of health benefits offered by natural foods, don’t forget to follow Homemaker Recipes. I’m here to help busy moms, health enthusiasts, and everyone in between discover the joys and benefits of home cooking! Home is where the best things are made!